From simple rotors to complex constructions: handles it all
Reviewed on 1 May 1982 by
EQiblyRot EQiblyRot
Detailed Rotor Balancing Process
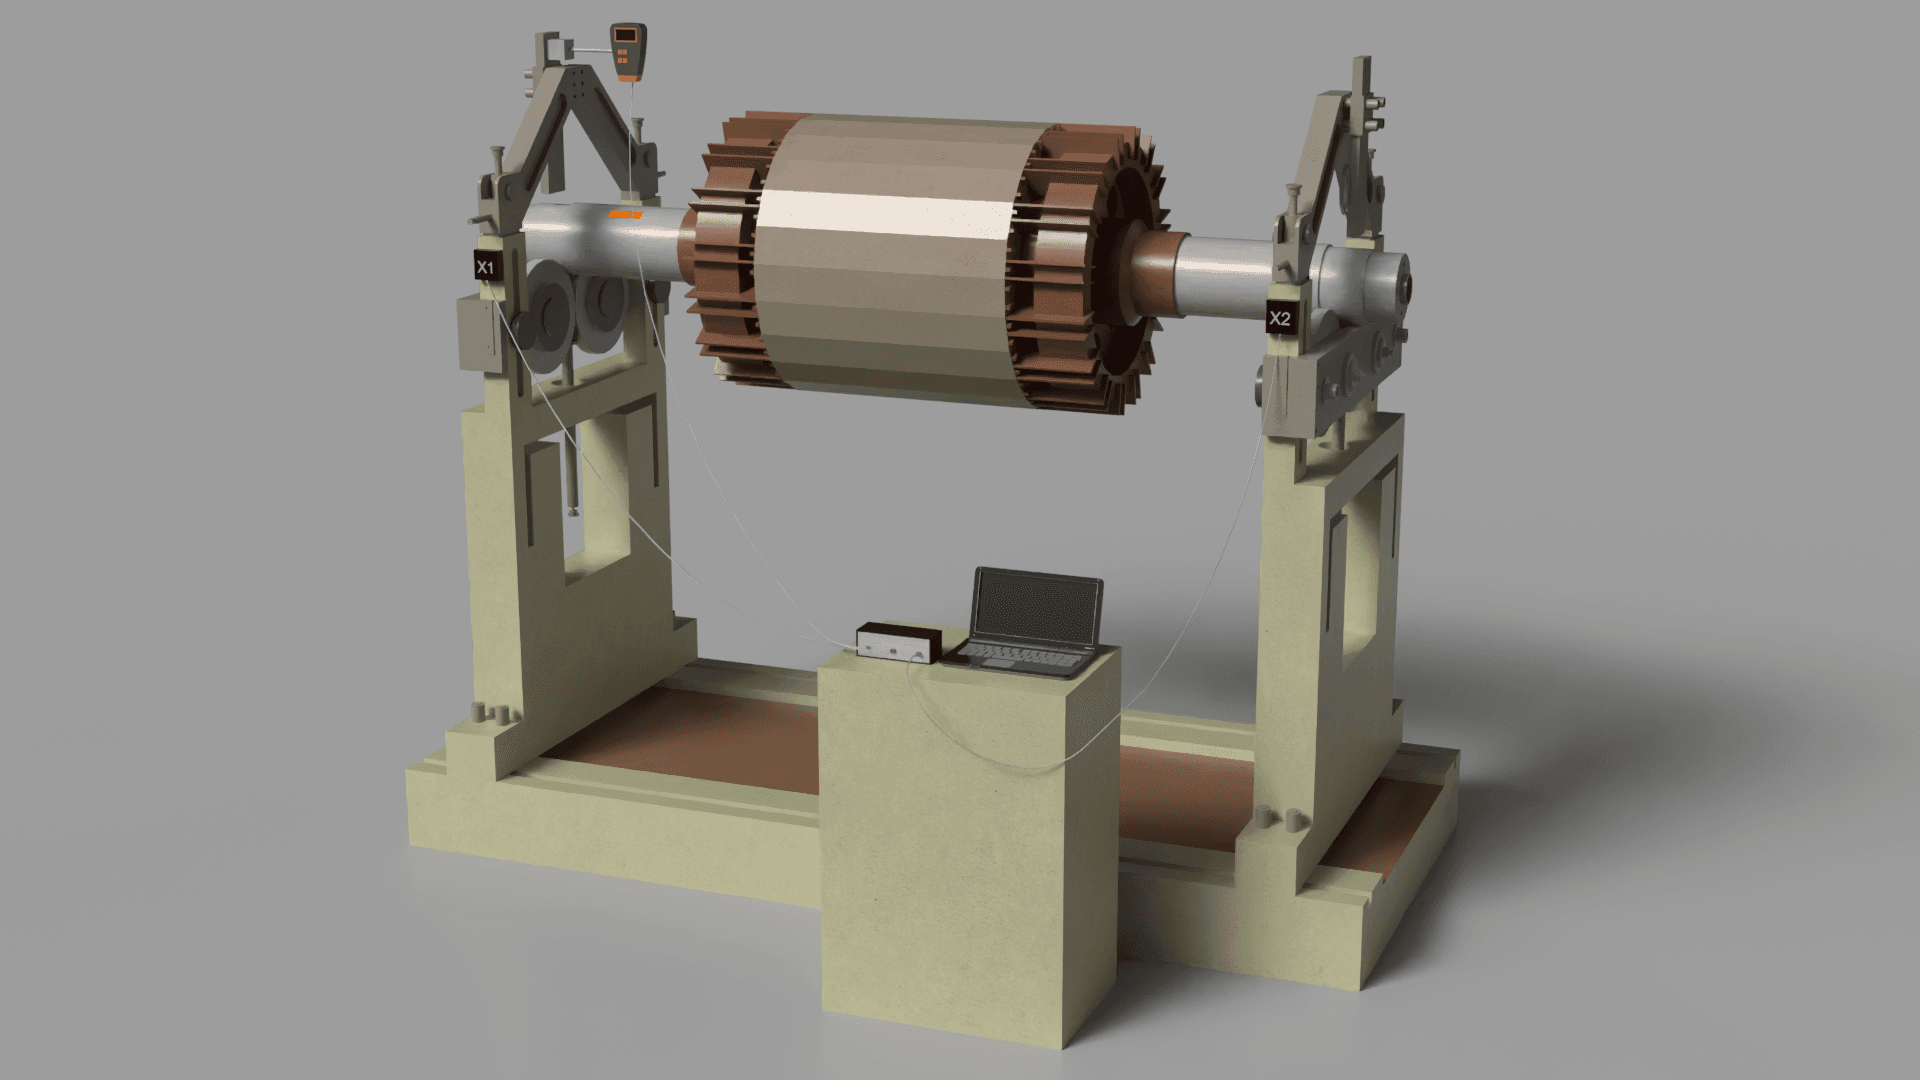
Equipment Preparation
- accelerometers, laser rpm sensor, mounting stand, software application, and additional tools.
- Set up the instrument and connect it to your computer via USB. Verify that the software is correctly installed.
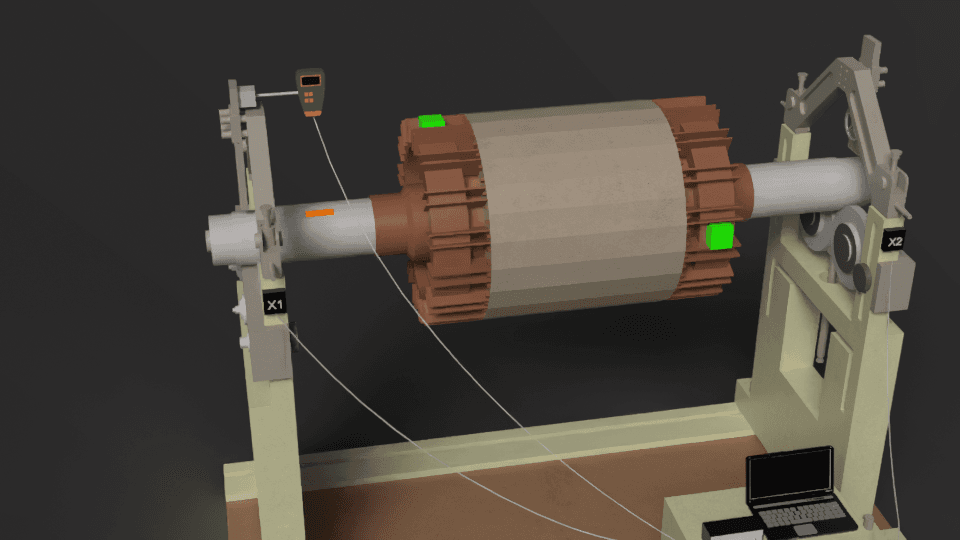
Mounting the Sensors
- Fix the accelerometers securely to the machine's structure in locations where vibrations are most prominent, ideally near the bearings.
- Direct the laser speed sensor towards the rotor and affix reflective tape to the rotor surface to facilitate phase angle measurement.
Software Startup
- Open the Balanset application on your PC.
- Select the appropriate balancing mode: single-plane or two-plane, depending on the rotor type and your specific requirements.
Initial Vibration Measurement
- Bring the rotor to its normal operating rotational frequency.
- The program will record the vibration amplitude, rpm, and phase, providing a baseline measurement of the existing imbalance.
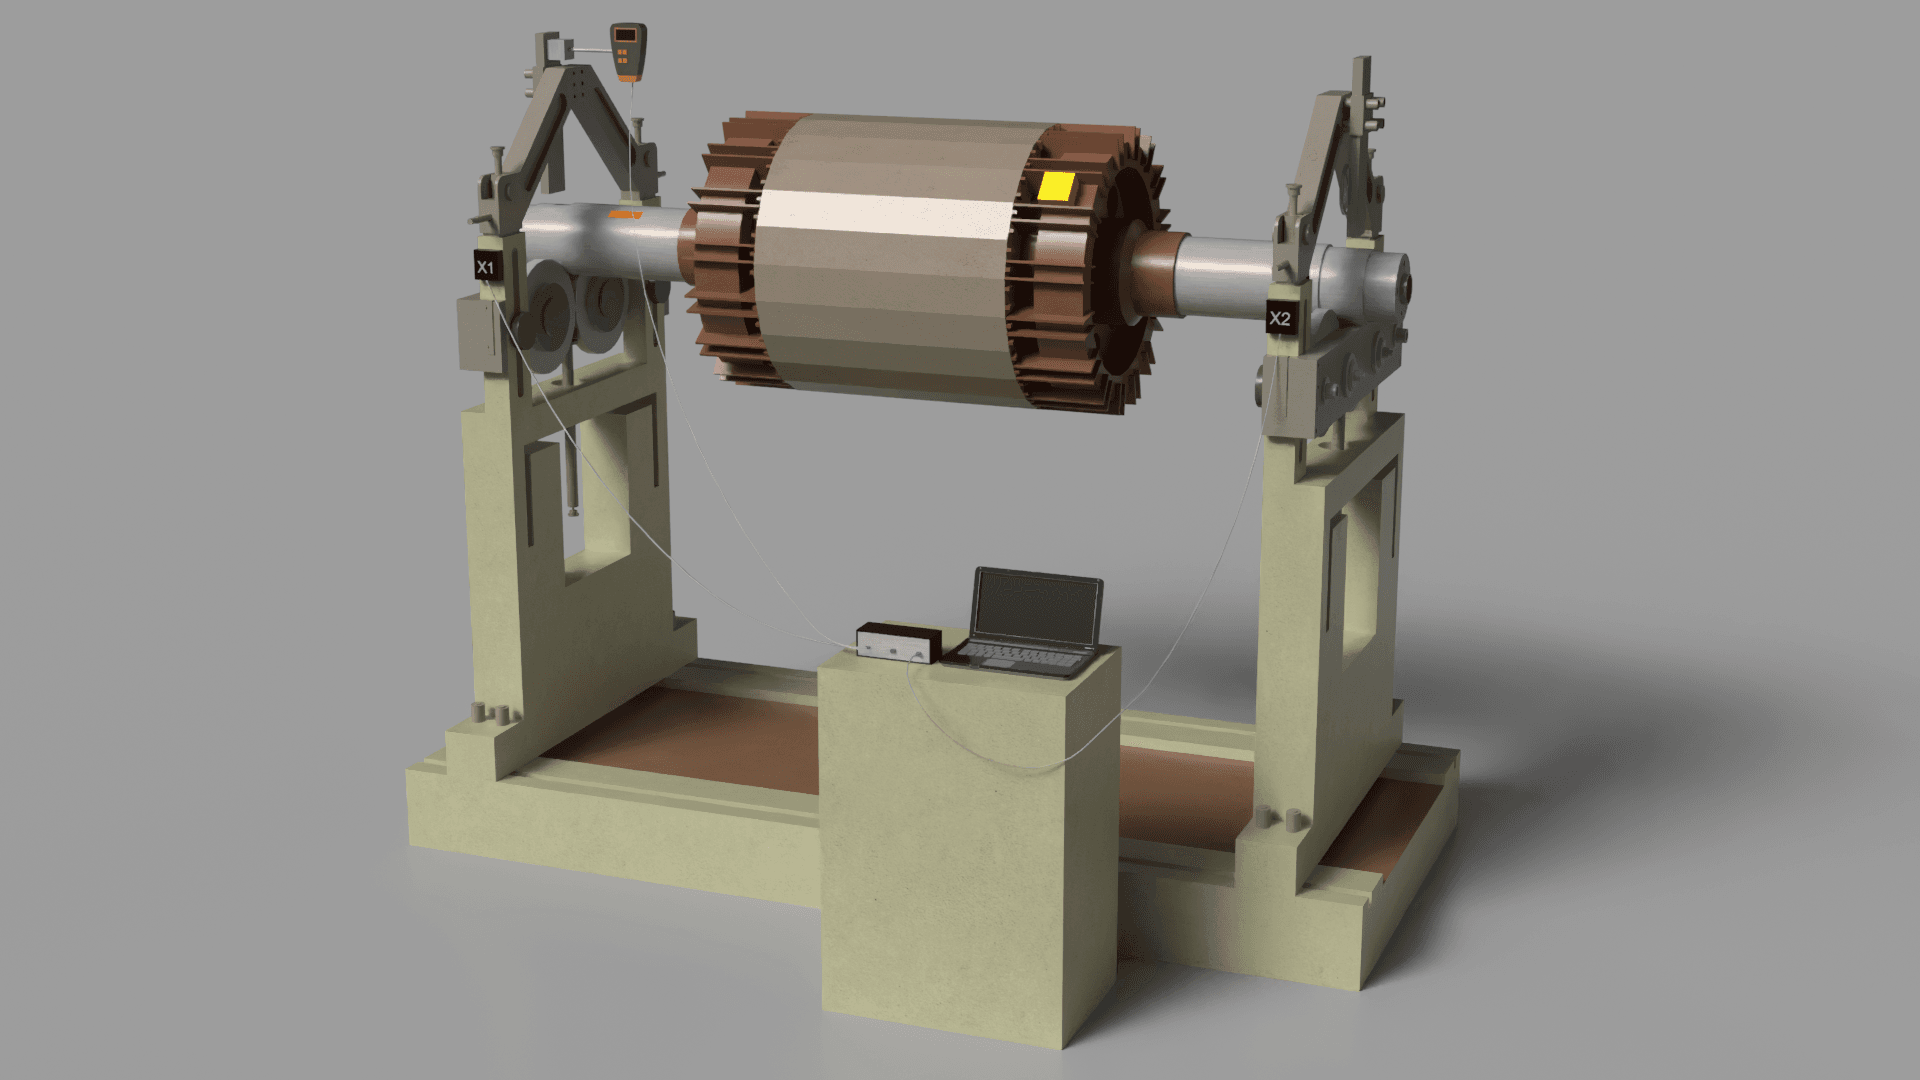
Attaching the Trial Weight
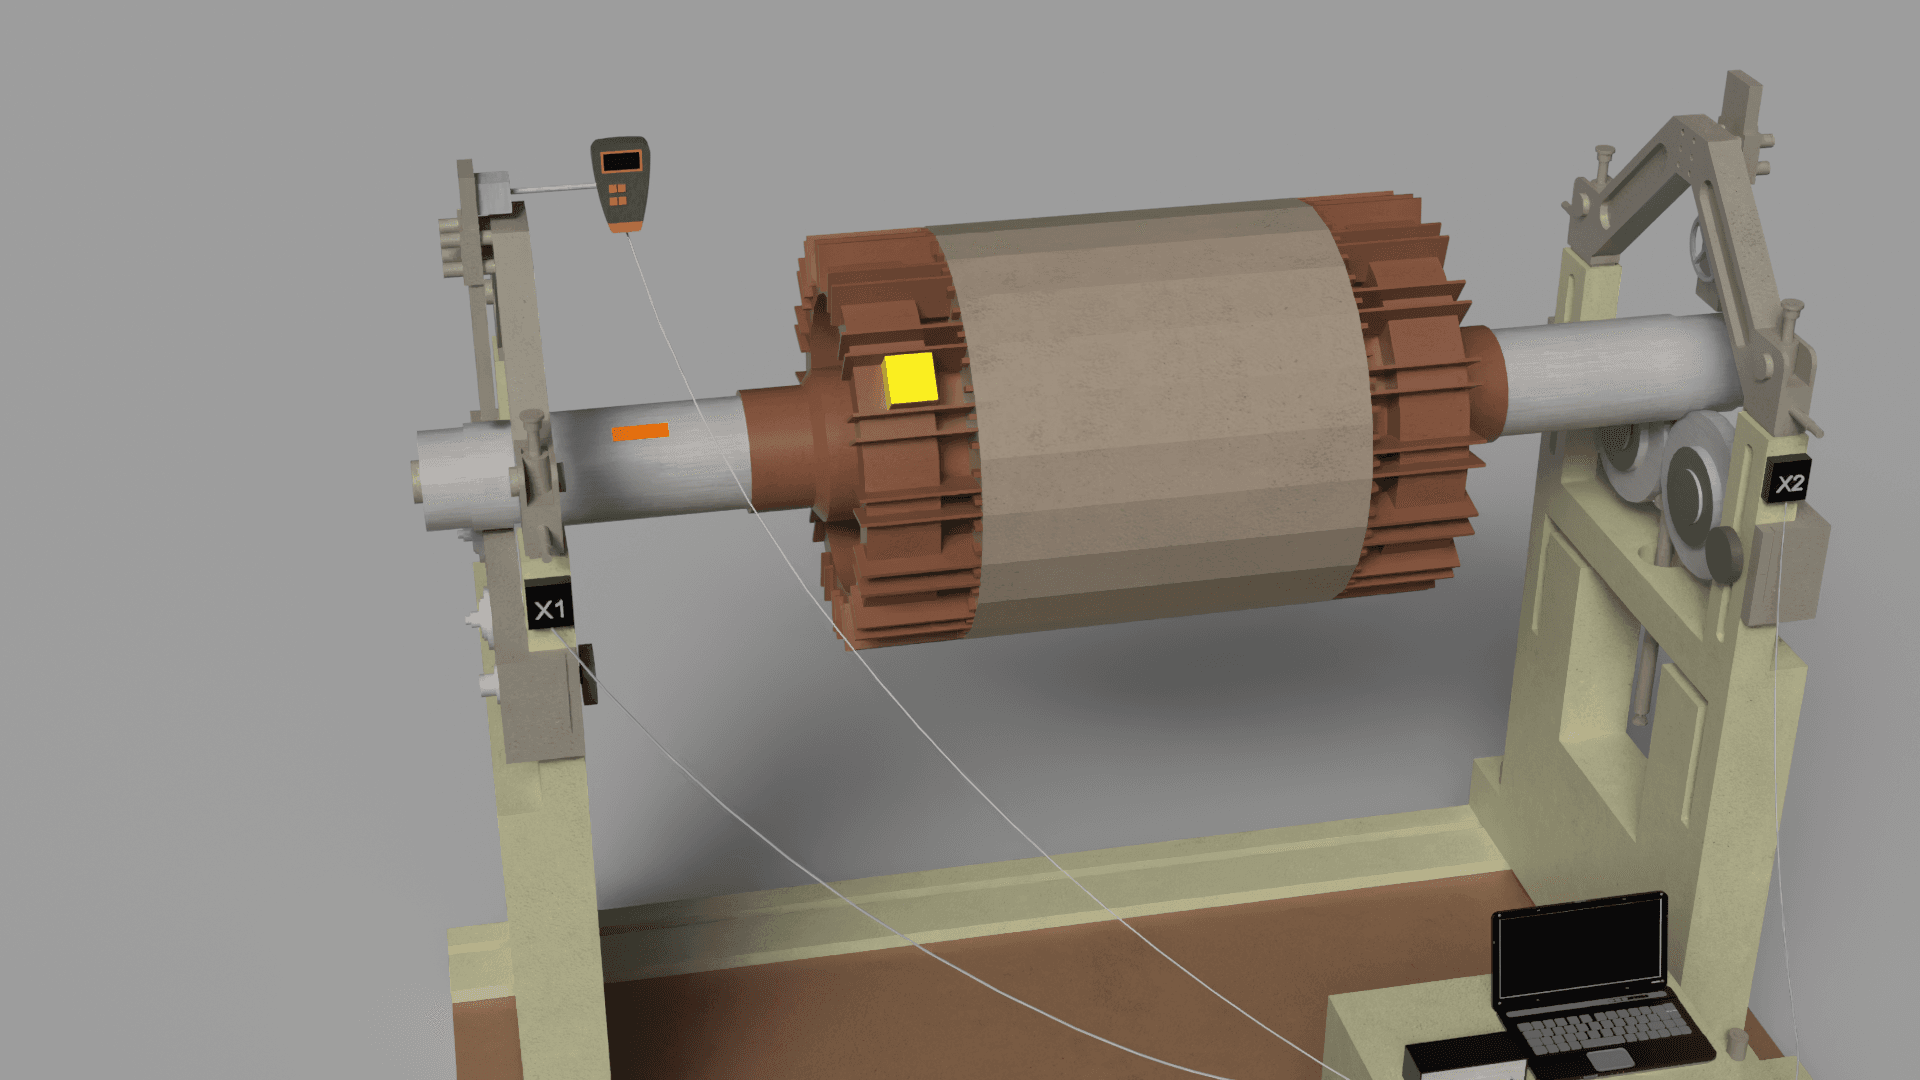
- Bring the rotor to a standstill and affix a trial weight at a predetermined point on the rotor, specifying its mass in the software (typically in grams).
- Run the rotor again, allowing the software to measure the effects of the trial weight on vibration and phase.
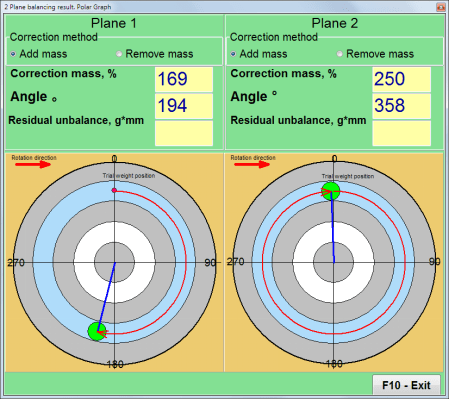
Determining the Corrective Mass
- Using the acquired measurements, the program automatically determines the required corrective weight's mass and angular position.
- These parameters are displayed on the screen as numerical data and graphs.
Installing the Correction Weight
- Attach the computed compensating weight to the rotor as indicated by the software's output.
- You can conduct interim measurements to confirm that the imbalance is decreasing as expected.
Final Check and Balance Confirmation
- With the compensating weight attached, operate the rotor and assess the level of any residual vibration.
- If the measured vibration falls within the tolerance defined by ISO 1940, the balancing process is considered successful.
- If the vibration level remains high, repeat the process with further weight adjustments.
Generating a Documentation of the Balancing Results
- The balancing results are saved in the software's archive. You can create and print a report containing vibration data, correction weight mass, and its installation angle.
Final Recommendations
- Ensure all applied weights and attached sensors are firmly fixed in their designated positions.
- Ensure the rotor rotates smoothly and without excessive noise.
- If the rotor operates within a larger assembly, check the functionality and interplay of all interconnected parts.
Instagram: https://www.instagram.com/vibromera_ou/ Youtube : https://youtu.be/guA6XJ-ArZM?si=vmkuX7RILzKBl0zL Our website about Elimination of compressor vibration Machinio: https://www.machinio.com/listings/98380186-portable-balancer-vibration-analyzer-balanset-1a-full-kit-in-portugal Facebook: https://www.facebook.com/marketplace/item/350151228150722 https://ohyesdirectory.com/listings189578/hassle-free-balancing-introducing-the-new-balanset-device